This post contains affiliate links. Please see our disclosure policy.
When you want a cookie in a hurry and don’t want to heat up the whole house with the oven, these panini press cookies are the answer! These small batch peanut butter cookies are a great option for satisfying summer cookie cravings.

Table of Contents
It takes about 10 minutes to bake the cookies in your panini press, and you can use your fave peanut butter cookie recipe or make my small-batch peanut butter dough to make six cookies!
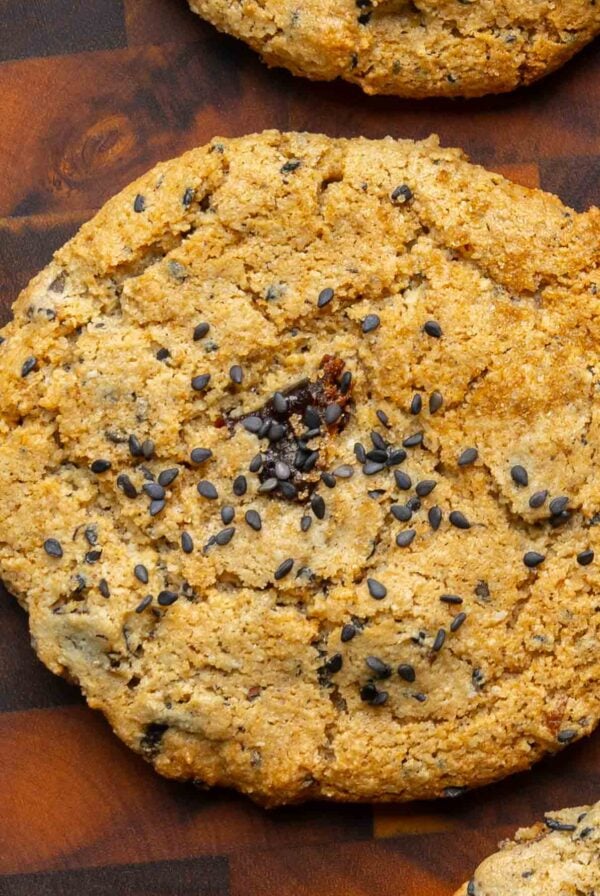
These cookies are crisp on the outside, soft on the inside, and packed with peanut butter flavor and plenty of chocolate chips!
You can easily make these vegan cookies gluten-free by using gluten-free flour.

When using a panini press to make small-batch cookies, the heat level as-is might be a little too much for the cookies. You want to protect the cookies from getting overly scorched at the bottom, so use folded up parchment paper. I use at least four to six folds of parchment, so there is a good base under the cookie. These cookies can be made anywhere where you can plug the panini press, they don’t the oven!
You are going to love these small-batch peanut butter cookies!

Why You’ll Love Panini Press Peanut Butter Cookies
- Small batch, so you don’t have a ton of cookies hanging out in the kitchen
- Easy to make
- No Oven needed, no Heating up the whole big oven and the kitchen.
- Perfect texture
- Packed with peanut butter and chocolate!
- Soy-free with gluten-free, peanut-free, and nut-free options

More Vegan Cookie Recipes
- Peanut Butter Oatmeal Chocolate Chip Cookies
- Brownie Cookies
- Snickers Cookies Gluten-free
- Almond Joy Cookies
- Vegan Chocolate Chip Cookies
Small Batch Peanut Butter Cookies in the Panini Press

Equipment
- panini press or sandwich press
Ingredients
For the wet ingredients:
- 2 teaspoons oil
- 2 tablespoons maple syrup
- 2 teaspoons cane sugar , or brown sugar
- 3 tablespoons smooth peanut butter
- a few drops of vanilla extract, optional, but adds a great flavor
For the dry ingredients:
- 2 tablespoons all purpose flour, , or use a gluten-free blend
- 1/4 teaspoon baking powder
- 2-4 tablespoons chocolate chips, as needed
Instructions
- In a small bowl, add the oil, maple syrup, sugar, and peanut butter and heat in a microwave, or you can pre-heat them in a saucepan until warm so that they mix together really well.
- In another small bowl, whisk together the flour and baking powder. Add the dry ingredients and the vanilla extract to the wet ingredients and mix really well until you get a smooth, sticky dough, then mix in 2 tablespoons of the chocolate chips. The dough will be very sticky at this point. You can add another 1-2 teaspoons of flour to make a sturdier, fatter cookie. This depends on the moisture content of your peanut butter. I am keeping it on the moist side to adjust
- Chill the dough for at least 10 minutes or put it in the freezer for 5 minutes.
- Preheat the your panini press. Find a setting on the toast or melt level where the sandwich maker top does not completely close and will not touch the top of the cookie dough. fold up your parchment paper to fit the panini press. Get at least four layers of parchment on the bottom so the cookies don’t scorch.
- Take the cookie dough out of the fridge or the freezer, scoop it onto the parchment paper, and top with more chocolate chips and/or sprinkles. Keep at least two inches between the cookies, and then put them in the panini press. Let the cookies cook for about 7 minutes, then turn the parchment around for even heating and keep an eye on the cookies. You don't want them to burn. When they're ready, the edges will be set but centers will be soft, the bottoms will be browning and cookies will set on cooling. Be careful not to overcook them. Bake 9-12 minutes based on your panini press and cookie size.
- Once the cookie bottoms are somewhat golden brown and the edges are starting to set, remove the parchment from the panini press and let the cookies sit and cool for 5 minutes or longer. Then, use a spatula to move them onto your cooling rack or plate.
- Store on the counter covered for upto 4 days
Video
Notes
Nutrition
Nutrition information is automatically calculated, so should only be used as an approximation.

Ingredients and Substitutions
- oil, maple syrup, sugar, and vanilla – These, along with peanut butter, make up the wet ingredients. Use white or brown sugar: your choice! The vanilla extract is optional, but just a few drops does give these small batch peanut butter cookies an amazing flavor!
- peanut butter – You can use almond butter instead of peanut butter for nut-free, just use an extra teaspoon or two of flour to get the dough to come together. You can also use sunflower seed butter and a few drops of lemon juice for a nut-free option.
- flour – The recipe calls for all-purpose flour, but you can make this gluten-free with a mix of oat and almond flour and a little bit of tapioca starch.
- baking powder – This helps the cookies rise. Do not omit or substitute.
- chocolate chips – You will put half of the chocolate chips into the cookie batter and sprinkle the remainder on top of the cookies for maximum chocolatiness!
Tips
- Every sandwich press is different, so I recommend making a test batch of cookies to get an idea of the cooking time you’ll need.
- For the gluten-free flour mix, combine 1 tablespoon oat flour, 1 tablespoon almond flour, and 2 teaspoons tapioca starch.
- If you use almond butter, the batter will be runny as-is. Another teaspoon or two of flour will firm it right up.
- If you use sunflower butter, please do use a few drops of lemon juice. Sunflower butter can react with the baking powder and turn your cookies an unpleasant green! The acid in the lemon juice prevents this from happening.
- Make sure you fold your parchment paper several times to protect the cookie bottoms from scorching.
- Make sure to rotate the parchment paper with the cookies on it at the 7-minute mark, so they’ll cook evenly.
- Avoid putting a cookie on the part of the press, where the top and bottom of the press are closest. On mine, that’s the back right corner. This location can vary, depending on your press.
How to Make Small Batch Peanut Butter Cookies in the Panini Press
In a small bowl, add the oil, maple syrup, sugar, and peanut butter and heat in a microwave, or you can pre-heat them in a saucepan until warm so that they mix together really well. Whisk until well combined.


In another small bowl, whisk together the dry ingredients: flour and baking powder.
Add the dry ingredients and the vanilla extract to the wet ingredients and mix really well until you get a smooth, sticky dough, then mix in two tablespoons of the chocolate chips.


The dough will be very sticky at this point. You can add another one to two teaspoons of flour to make a sturdier, fatter cookie. This depends on the moisture content of your peanut butter. I am keeping the batter a bit more moist, so that even the drier peanut butters will not make a dry cookie.
Chill the dough for at least 10 minutes or put it in the freezer for 5 minutes and preheat the your panini press.
You do not want to press the cookies, so find a setting on the toast or melt level where the sandwich maker top does not completely close and stays in somewhat open position. Depending on your panini press, there might be areas where it is closer to the bottom. So when you’re placing the cookies, you want to be mindful of that. fold up your parchment paper to fit the panini press. Get at least four layers of parchment on the bottom.

Take the cookie dough out of the fridge or the freezer, scoop it onto the parchment paper, and top with more chocolate chips and/or sprinkles. Keep at least two inches between the cookies, and then put them in the panini press.


Let the cookies cook for about seven minutes, then turn the parchment around for even heating and keep an eye on the cookies. they can scorch or overcook. Total cooking time can take anywhere from 9 to 12 minutes.

Once the cookie bottoms are somewhat golden brown and the edges are starting to set, remove the parchment from the panini press and let the cookies set and cool for five minutes or longer. They will be soft and fudgy and will continue to set as they cool.

Then, use a spatula to move them onto your cooling rack or plate. Or just eat them, because who has time to wait for cookies?

Frequently Asked Questions
You may have overcooked the cookies. When making small batch peanut butter cookies in the panini press, you want to pull them out before they look fully done. The bottoms will be a bit browned, but the sides won’t look finished. If you wait until they look done inside the press, they will overcook and turn out hard.
This can also be caused by overcooking. See the question above for details on how to make sure you don’t overcook. Another reason is the fact that this recipe is nut butter heavy with less flour(flour acts as binder). The brand of nut butter also might make them more delicate.
Yes! Chilling the dough helps prevent the cookies from spreading out too much during baking. If you don’t chill the dough, you might end up with one, large, thin cookie.
To make this gluten-free, use gluten-free flour, or you can use a mix of 1 tablespoons oat flour, 1 tablespoons almond flour, and 2 teaspoons of tapioca starch.
To make this peanut free, you can also use smooth almond butter. You will need to add another one or two teaspoons of flour to the batter so that it’s not overly runny. You can also use cashew butter or other nut butter.
For nut-free, use sunflower seed butter, but definitely add a few drops of lemon juice to the batter so that the cookies don’t turn green. Sun butter has this property of reacting with baking powder and becoming green after baking.
Yes! Bake at 340 deg F(170c) for 10-11 minutes


These look amazing! What kind of oil do you recommend?
Safflower or sunflower
These are super fun to make in the summer. No need to start the whole big oven! I doubled the recipe!
Awesome
Burned my panini maker. Smelled sooo bad.
Not sure what happened. There’s parchment so it can’t stick to thenpanini maker. The top has to be at a setting where it doesn’t touch the dough on top
WOW!!! Has anyone tried this with a foreman grill yet?
would definitely work!
Hi! Wow! I’ve never thought of using a panini press for cookies before! I will definitely be trying this out next time I bake. I was wondering, do you notice a big texture difference when you use almond butter instead of peanut butter?
Almond butter cookies are softer and more moist
What a novel idea. Richa, you are always thinking outside the box!
thank you, Sue!
These cookies sound amazing and easy, but I don’t have a panini press. Can I make them in the oven? If so, at what temp and for how long? Thank you for your anticipated feedback!
At 340 F for 10-11 mins
These look so good! I wonder if it might work to substitute apple sauce for the oil?
Just omit the oil.
Looks delicious! Any tips for making them without a press?
Bake in oven at 340 f for 10 mins