This post contains affiliate links. Please see our disclosure policy.

Is it just me, or there are fewer hours in a day in Summer:) Time just seems to fly by.. With just 3-4 warm and sunny months, there seems to be numerous things to be done, events, plans and celebrations.. Lots of baby showers, babies:) I have some posts in drafts, but with unedited pictures. And Also a bunch of reviews and giveaways, and the awards that some amazing bloggers have passed on to me!
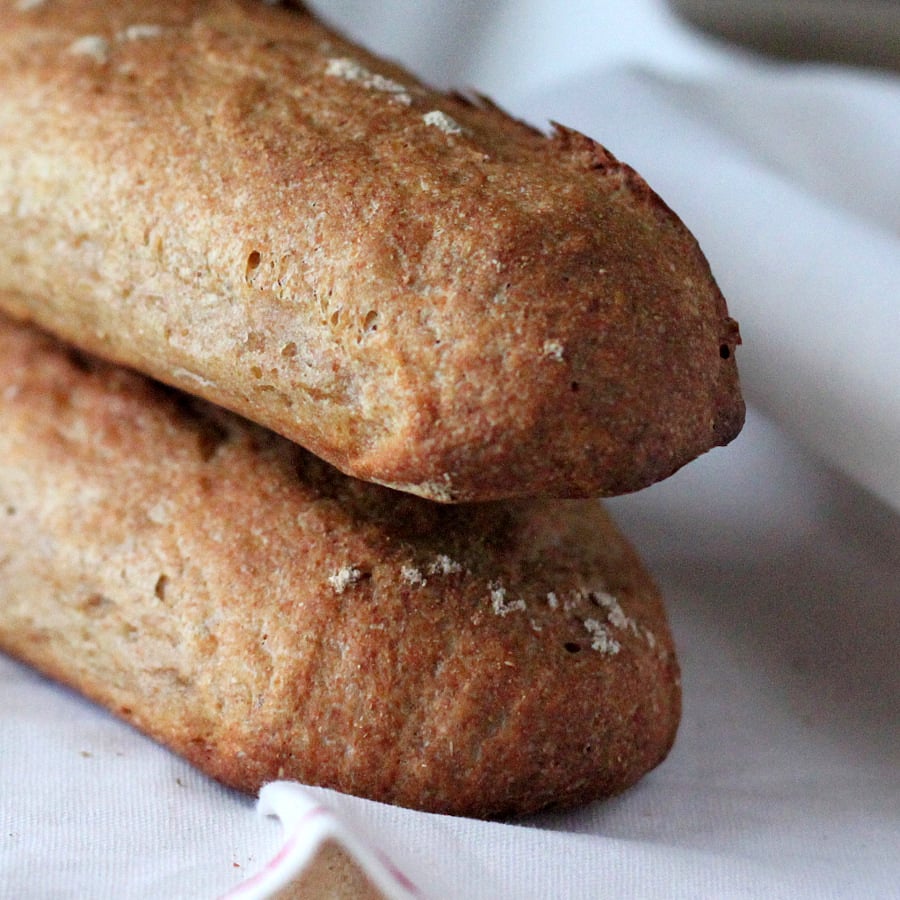
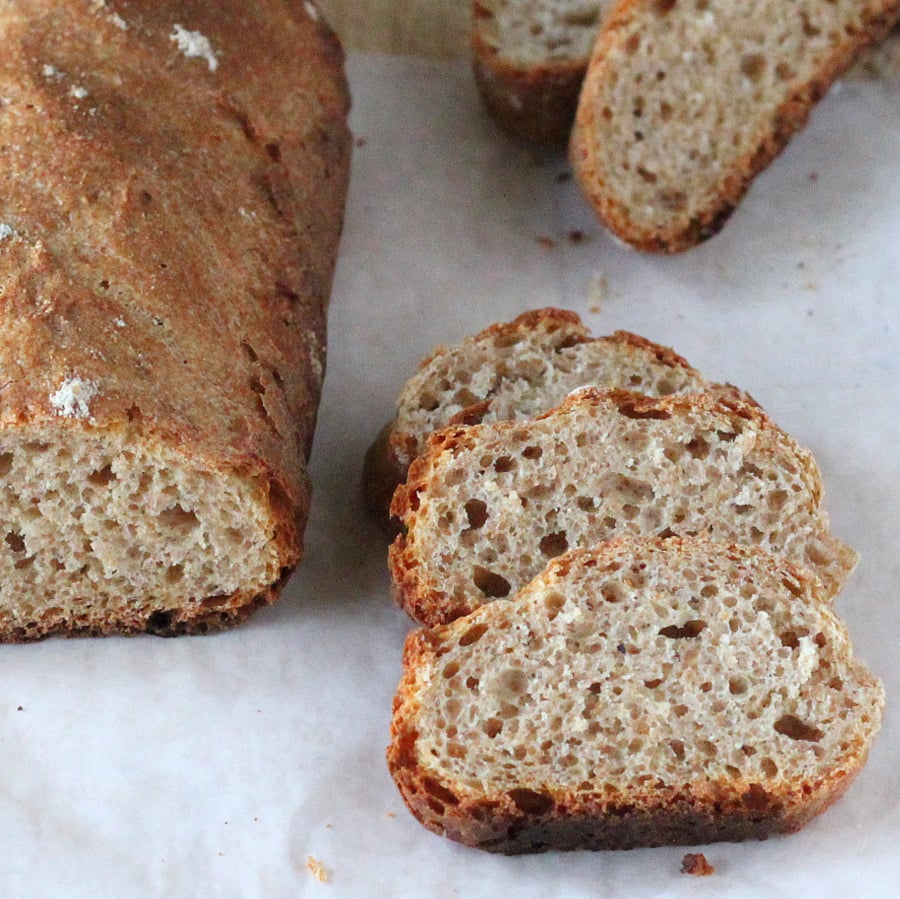
Lets get to the recipe.. A wheat baguette or long loaf. This is not a very artisan chewy baguette. This loaf keeps well for a few days, is soft on the teeth and can be used for sandwiches. You can shape this any which way. make buns, or a medium sized loaf in a bread pan. This dough is like my Everyday sandwich bread. Versatile and can be easily adapted to make a sandwich bread loaf, pizza crust and what not.
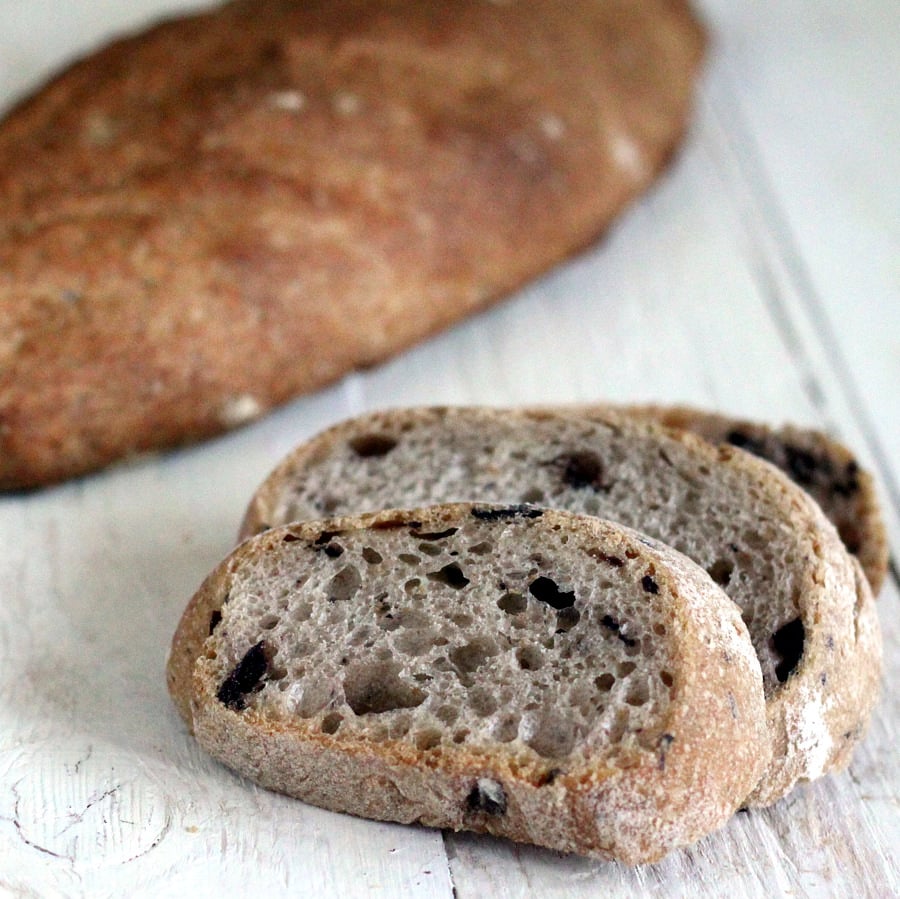
Added some chopped olives for an Olive loaf below. Add chopped garlic and herbs for a garlicky loaf, add seeds of choice, cooked whole grains, dried fruit etc for variations.
There are videos and links on the steps below to help. When starting out, I did follow the procedures to the T. After baking a bunch of loaves, I cut down steps to just about work it(I am lazy, or as hubbs sez.. an engineer who optimizes everything).Once you get a feel of the dough and how your flours and dough bake, you can cut down on the kneading and shaping and such. When I started out baking breads, all the information and details made it feel like a completely new art to learn. but it isnt so.:) If I can bake a bread, you can too.
Ingredients:
1/4 cup water
1 teaspoon raw sugar
1 teaspoon active yeast
1/4 cup+ 2 Tablespoons water
2/3 teaspoon salt
1 Tablespoon agave/maple
1 Tablespoon oil
1/2-3/4 cup bread flour
1 Tablespoon vital wheat gluten(optional)
1 cup wheat flour
Method:
In a bowl, add a 1/4 cup warm water, sugar and yeast and mix well. Let sit for 10 minutes or until frothy

Add the 1/2 cup bread flour, gluten, wheat flour, salt, agave, oil and mix for a few seconds.

Add 1/4 cup+ 2 Tablespoons cool water and knead for 2-3 minutes. You might need a few Tablespoons more bread flour(depends on the wheat and other factors)

Knead into a just about smooth dough. 4-5 minutes

Let rise for 1.5 hours or until more than doubled.

At this point, you can punch it down and refrigerate it overnight for a better texture and developed flavor.

Or punch it down and knead for a minute. Use a little bread flour to work. Throw on the counter top for another minute. Divide the dough into 2 for long loaves(or make rectangle and roll up into one bread loaf for a medium size sandwich bread pan). Roll each between your hands or on a surface to form a log.(You can also make a rectangle and fold it in twice and seal and then elongate it by rolling. Video here)
Liberally dust the logs and place on parchment to rise. Cover lightly with a towel and let rise for 40 minutes.

Preheat the oven to 400 degrees F. Slash/score the loaves on top as desired. (how to score baguettes here). I usually add a few shallow cuts with a sharp knife.
Spray top with water and bake for 20-25 minutes for 2 loaves. 35-40 minutes if baking 1 loaf in a bread pan.( I spray the top with water instead of baking at very high temperature and then tossing in ice cubes for a chewy crust. I prefer my loaves less tough and chewy)
Cool completely(half an hour) before slicing.

These loaves are heading to Susan’s Weekly Yeastspotting, Ricki’s wellness weekend, slightly indulgent tuesdays, Hearth and soul blog hop


Is it alright not to add in the maple/agave?
Sure, you can use any sweetener or equivalent sugar.
is it alright not to add the agave/maple???
aaaaah olive loaf – YES! This bread looks so yummy, perfect for bruschetta!
I love the idea of adding olives! Olive bread is my favorite, but it’s quite hard to find at bakeries. I really need to try making bread someday. Yours looks absolutely perfect!
Thanks Kiersten. Give breads a try. Once you start baking some, you cant stop!
bread looks fantastic. perfect texture.
Summer days do seem to slip away more quickly, don’t they?
My first bread making experience was with baguettes (my grandma taught me, and her mother taught her). I would love to try a whole wheat version! Awesome!
i havent had any white bread except some sourdough in a bunch of years now:) make bread Kristy!
I just made my first loaf of bread over the weekend- and now i’m excited to venture out and try other loaves. This looks great – thanks for the step by step!
You’re right, so much more happen in the Summer, which is not necessarily a bad thing. Thanks for the step by step guide for making this loaf. I also like the idea of adding olives and garlic 🙂
Just lovely!